Instead of buying the whole stuff in the house, which sometimes needs a lot of money, a DIY project would be worth trying.
It is a versatile project, which will sharpen your woodworking skill. On the other side, it is good for your budget. Try making the DIY keyboard tray that you will love.
It might take time if you are a beginner. But, it would be a perfect choice if you are planning to upgrade your woodworking skill.
Here we have picked the best ideas to inspire you, so you don’t need to worry about running out of ideas.
Contents
- Install The Pull Out Keyboard Tray
- Stay Simple, Make It Easy
- DIY Keyboard Tray Under Desk
- Install The Keyboard Tray Underneath
- Upgrade Your Desk
- Create The Midi Keyboard Tray
- The Flexible Tray
- DIY Keyboard and Mouse Tray
- Slide Out Keyboard Tray
- Hang It On The Desk
- DIY Keyboard Slide Tray
- Make It Sophisticated
- DIY Articulating Keyboard Tray
- Beneath the Table Installation
- DIY Swivel Keyboard Tray
- DIY Keyboard Lap Tray
- DIY Music Keyboard Tray
- DIY Sophisticated Keyboard Tray
- Install The Rustic Style
- DIY Small Keyboard Tray
- Highlight The Shape Of The Wood
- The Keyboard Tray On The Desk
- Attach The Tray Using C-Clamps
- Mount-It On The Wall
- Free Up Your Space
- Boost Your Productivity
- DIY Industrial Keyboard Tray
- Opt For The Small And Minimalist One
- A Minimalist And Stylish In One
- DIY Edgy Keyboard Tray
- Make It Invisible
Install The Pull Out Keyboard Tray

The pull-out keyboard tray is the best. The right measurement will create an ergonomic desk, which is good for your health. And this DIY pull-out keyboard tray is all that you need.
Create a drawing of the desk, along with the approximate measurement. Cut down the wood materials, then build them into a desk, along with the keyboard tray underneath.
The black paint looks good on the eyes. It represents a cool ambiance as well.
Stay Simple, Make It Easy

The minimalist style is one of the everlasting styles, which is getting popular nowadays. This simple feature in the working space take a huge part to boost your productivity through the ergonomic keyboard tray.
It is the best answer if you are wondering how to add a keyboard tray to a desk.
Attach the bracket to the floating desk, then create the sliding board system. Paint the board with eye-catching paint.
The fresh paint creates a cheerful atmosphere and attractive look at the same time.
DIY Keyboard Tray Under Desk

If you spend more time at your desk, ensure it is good for your health. Talking about health, an ergonomic position while writing is an essential thing. Hence, creating a proper keyboard tray is also important.
Here are the supplies you will need to make it works:
- Plywood
- Piano hinge
- Keyboard slides
- NavePoint 4U vertical rack rail pair DIY kits
Place the wristpad in front of the keyboard and the mouse. It comforts your hands so that you can be more productive.
Related post: DIY Computer Desk with Plans
Install The Keyboard Tray Underneath

When people keep wondering how to make under desk keyboard tray, you should start making it instead.
You can make the whole desk along with the keyboard tray. And if you are going to add the keyboard tray, start by tracing the plastic deck onto the sanded walnut, then cut it down.
Polish it and let it perfectly dries for a better look. Complement your keyboard tray with silicone molding. It helps your wrist rest properly while you are working.
Upgrade Your Desk

When it comes to the midi keyboard, it needs a sturdier keyboard tray. This tray is installed beneath the table, which is complemented by the sliding compartment.
Paint the keyboard tray with the same color as the desk. The dark painting will always be a good option for an elegant look. It is a little bit tricky to install the sliding tray.
But once it is installed, it is perfectly versatile to support your work.
Create The Midi Keyboard Tray

Pay attention to the measurement of the desk in your working space. It must be ergonomic, which won’t harm your body. It works the same way for the keyboard tray.
The simple sliding keyboard tray will be great. You can push it when it is unused to keep the room looks tidy.
This simple project must be on your list if you are a beginner since there is no certain skill requirement.
The Flexible Tray

With the skill you have, this DIY adjustable keyboard will be perfect to improve your skills. This additional feature is versatile and also easy to make. When a keyboard tray is usually installed beneath the table, this one is installed above the table.
Get the following materials to make it:
- 2 orbit watermaster
- 1 orbit watermaster
- 2 NIBCO 1/2 Inch PVC schedule 40 Tee
- 6 1/2 U-Clamps
- 10 small screws
- 10 small washers
- 1 2″ x 10″ plywood riser
- 1 12″ x 26″ plank
Tip: you can apply this project for DIY Lap Desk too.
DIY Keyboard and Mouse Tray

Placing the keyboard and the mouse at the same level would be good for your hand. Upgrade your desk and add the keyboard mouse and tray under the desk.
Ensure this DIY keyboard tray is from a 90-degree angle when your arms are typing on a keyboard. It will need some materials with no special skill requirements. All that you need is just the following supplies:
- Leg materials
- Tray surface
- Drawer slide pair
- various screws
Attach the tray to the desk with a perfect level.
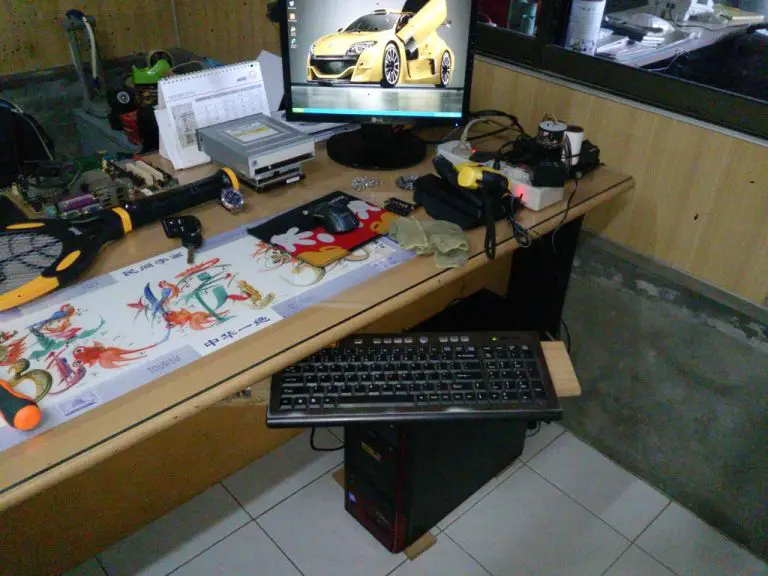
Slide Out Keyboard Tray

Upcycle your old drawer and transform it into a cool desk, where you can be more productive. It is not a big deal to make it works.
You can transform the middle top drawer into a keyboard tray and remove the rest of the drawers beneath. Then, remove the desk drawer face. Install the hinges, then attach the female and male parts of the double roller catches so that you can lock the tray easily.
If you want to expose the natural color of the wood and make it looks brand new desk.
Hang It On The Desk

This slender desk needs an additional feature that works functionally to hold the keyboard. It is a super simple DIY keyboard tray project you can do within hours. The material you will need to make a keyboard tray are:
- Smooth slider tracks
- C-Clamps
- Wooden board
You can simply assemble the slider tracks and attach the wooden tray to the bracket. After all, you can mount the tray to the desk using the sturdy solid clamps.
DIY Keyboard Slide Tray

This DIY keyboard tray needs a little advanced skill. You will need the 3/4 7 ply 4×8 pine boards. Cut down the pinewood after you measure and outline it as well. Sand down the wood for a smooth surface.
Stain the woods using Minwax espresso oil stain and let them dry, then coat them with the clear stain. Assemble the desk along with the sliding keyboard tray, then fasten them using screws.
You don’t need to worry about the messy cable since this desk is complemented by the cable routing holes.
Make It Sophisticated

Complement the working desk in your house with an adjustable keyboard tray, which would be such a good idea. It helps your family while using it occasionally. This adjustable keyboard helps you to get the best position while using it.
For the DIY adjustable keyboard tray, you will need the following supplies:
- 2 Slotted angle brackets
- 2 Drawer slides
- 2 Barrel bolt lock
- 10 Screws
- 3″ machine bolts and nuts
- Fender washers
Assemble the hardware and attach them to the legs of the table.
Once this keyboard tray is installed, you can adjust it as you wish and use the keyboard comfortably.
DIY Articulating Keyboard Tray

Try upgrading the old desk in your house with a simple additional feature. It is an unusual keyboard tray. It doesn’t like a common DIY keyboard tray because it has the legs to hold the tray sturdily.
The sturdy legs are formed from the pipes.
Here are the materials you will need:
- 2 x Custom Desktops
- 1 x Custom Cut Keyboard Tray
- 1 x Keyboard Tray
Assemble te legs with all the materials you will need. You can paint the keyboard tray with the same tone as the surface. And if you want a different accent, choose a different color.
Beneath the Table Installation

The simple keyboard tray under the desk could be simply made out of a wooden board, which is complemented by the slider.
The supplies that will help you to create a proper DIY keyboard tray are:
- White melamine shelf
- Prestige 300mm/25kg drawer slide
Cut down the melamine shelf, then screws the melamine where you will attach the slider. Attach the tray to the desk and secure it properly.
DIY Swivel Keyboard Tray

The flexible keyboard tray is such a good feature that will help you to improve your productivity. Plus, it is also good for your health.
This slide-out keyboard tray is formed from the swivel wheel’s base. And if you want to make the swivel way sturdier, add more grip of metal that creates a cross (x). Screw the swivel wheel to the bottom of the desk, then fasten it as well.
DIY Keyboard Lap Tray

You will need this DIY keyboard lap tray if you want to play a video game or even do the project while you are working on the couch. It is a cool keyboard tray, which is upholstered by black leather.
The black leather looks cool, which works functionally in your space. No worries, the lap keyboard tray is complemented by the cable hole to keep the mouse and keyboard holes tidy. It would be perfect if you put the wrist pad in front of the keyboard.
DIY Music Keyboard Tray

Create the music comfortably in your studio with a proper and cool keyboard tray.
It is attached under the curvy table. With the slider installation, you can pull it out when you are going to use it. Then, put it back when it is unused.
Here are the materials you will need:
- 2 long heavy ball-bearing drawer slides
- 4 90° shelf supports
- 4 small thick pieces of wood
- Wood screws
- Two by fours
DIY Sophisticated Keyboard Tray

Make the working space in your house look sophisticated with this keyboard tray. It will upgrade your woodworking skill to the next level effortlessly.
The materials are:
- 1 x3 four 6″ lengths
- Four 2″ legs
- Tray surface (pressboard panel)
- Drawer slide pair
- Various screws
With the following magical tools, you can transform the materials into a DIY keyboard tray:
- Hand drill and bits
- Tape measure
- Saw
Measure and trim the materials, then assemble them. Attach them to the desk, and the keyboard tray is ready to use.
Install The Rustic Style

For this DIY project, try exposing the natural color and natural texture of the keyboard tray.
The keyboard tray is attached beneath the desk, which is complemented by the black slider. The black slider creates a solid lining when you pull out the tray.
Keep the tray along with the desk looks clean without any stain. Consider polishing it with clear spray paint. Other than that, the conditioner appliance on the surface will help you to prevent dry surfaces.
DIY Small Keyboard Tray

If you have to deal with the limited space in your house, then the small desk would be great. Add the keyboard tray you can make yourself during your leisure time.
Choose plywood material with patterns and a warm accent. It will create a different hint. The best thing about this project is that it is easy to make. The thing is, you have to make sure that you use a good quality of materials.
Highlight The Shape Of The Wood

It is the stylish look of the rustic design with the natural shape of the wooden material. Then, consider exposing the natural texture and the color of the wood, which works as a keyboard tray.
The slider on both sides accommodates the wooden tray to be adjustable. Highlight the natural texture of the wood through the polish.
This keyboard tray has a brighter tone than the desk above. It looks contrasts beautifully together, which is worth having.
The Keyboard Tray On The Desk

Add this adorable feature to your workspace that will bring a different accent to the light atmosphere of your desk. It is a small screen tray made out of wooden material, which is complemented by the keyboard tray beneath the screen tray.
It looks perfect together, adding a dark hint to the light desk. Also, the keyboard is held by a wooden pad, which is good for your wrist and keeps the keyboard stays in place.
Attach The Tray Using C-Clamps

There is nothing to worry about when your working desk is not complemented by the keyboard tray. You can attach it yourself and make it works properly.
The tray is made out of MDF, which is sturdy enough to accommodate your keyboard. The clamps are made out of metal material, which is sturdy enough to support the tray work properly. Complement your tray keyboard with the safety keyboard stopper to make it stays in place.
Related post you might like: Study Room
Mount-It On The Wall

There will always be a great hack to deal with a limited area in your house. It is installed under the floating shelf where it could be a working desk.
This DIY keyboard tray installation is formed from metal material that is attached to the wall right under the wooden shelf.
This tray has two higher sides where you can put the mini speakers on both sides or a mouse. Add a safety keyboard stopper to prevent slipping.
Free Up Your Space

With the limited space in your house, this floating desk could be a keyboard tray when you install the monitor over the shelf.
To prevent messy cables, consider using the wireless keyboard and also mouse. Other than that, this keyboard tray is complemented by a small space to organize the monitor’s wire.
The wireless stuff is such a perfect device. It is a smart choice if you love the simplicity and planning to apply a minimalist style.
Boost Your Productivity

If you really love spending your time wisely, then installing the keyboard tray on your treadmill would be a smart hack, which is worth trying.
You can write while doing a little workout at the same time. With the wooden fence posts, you can attach the closet shelf, which would be a shelf to put your laptop on. Then, put the keyboard tray track on sideways. It is a great installation, you need to try.
DIY Industrial Keyboard Tray

Consider exposing the natural color of the wood and highlighting the texture. It is one of the easiest ways to enhance the industrial look of your keyboard tray. With the following materials, you can create your own keyboard tray:
- Brackets
- Hinges
- Sealed solid acacia hardwood tray
- Steel tracks.
Opt for the black hardware that will bring a sturdy vibe and make the industrial style look way stronger. The sliders allow you to get an ergonomic keyboard tray, where you can set it as you wish.
Opt For The Small And Minimalist One

Upgrade your old desk and turn it into a cool working desk. To make this installation, you don’t need any certain skills. So, even if you are a beginner, you can make it.
Get the supplies that will be needed:
- Wooden plank
- Slider
- Brackets
- Screws
Attach the sliders to the wooden plank, and screw them.
Let the wooden plank expose its natural texture to add a warm and natural accent between the dark desk. After all, put the keyboard on the tray and get ready to write as well.
A Minimalist And Stylish In One

If you love the minimalist design, place this minimalist keyboard tray made out of wood on the working desk.
The wireless keyboard and the touchpad would be perfect in this versatile and stylish keyboard tray.
The solid wood looks gorgeous, exposing the natural pattern of the wood. The stain finishing is the key element of this look.
To make this tray, you only need to measure the keyboard and the touchpad. Then cut down the wood. Place the wireless keyboard and touchpad after the finishing is perfectly dry.
DIY Edgy Keyboard Tray

Bring a natural ambiance to your house elegantly and functionally at the same time.
It is a simple desk made out of wood with the natural curve of the wood.
The supplies you will need to make this keyboard tray are:
- Screws
- Sliding keyboard tray
- Wood
- Clamps
- Epoxy
- Sander
The keyboard tray is attached to the underside of the desk using clamps. The finished look of this desk, along with the keyboard tray underneath, creates an elegant industrial style.
Make It Invisible

If your house is full of stuff, which makes the room look narrow and messy, consider the covered drawer to hide the unwanted view.
It works the same way for the keyboard tray.
And the materials you will need are:
- MALM Dressing table
- Cabinet hinges
- MDF
- 35mm drill bit
- Wood filler
The tray could be extended storage and place the keyboard at the same time. And when it is unused, close the drawer and put back the keyboard tray.
These are the best 31 DIY keyboard tray ideas that will help you to keep your hands in a good and ergonomic position.
Aesthetically, it can make a statement to the room in your house. Other than that, your room looks way tidier and clean.